

Getting started with Exegol Studio New!
If not already, install Exegol Workstation first.
No. Studio attaches to the containers you already start with exegol start. It installs no tools in the image and changes no wrapper configuration. Uninstall the extension and your containers are unchanged.
1. Install the extension
| Editor | How |
|---|---|
| VS Code | Extensions → search Exegol Studio → Install |
| Compatible forks | Same Marketplace listing when available |
Open the Exegol Studio activity bar icon after install. If nothing appears, reload the window (Developer: Reload Window).
2. System checks
Open Settings (in the Primary Side Bar on the left, Cog icon) → System check. Run it. It probes Docker (CLI and daemon), the Exegol CLI, whether an image and container exist, and whether the project's primary container is running. On Linux it also checks your user can reach the Docker socket (usually the docker group). If any checks fail, follow the instructions to fix them (i.e. adding your user to the docker group).
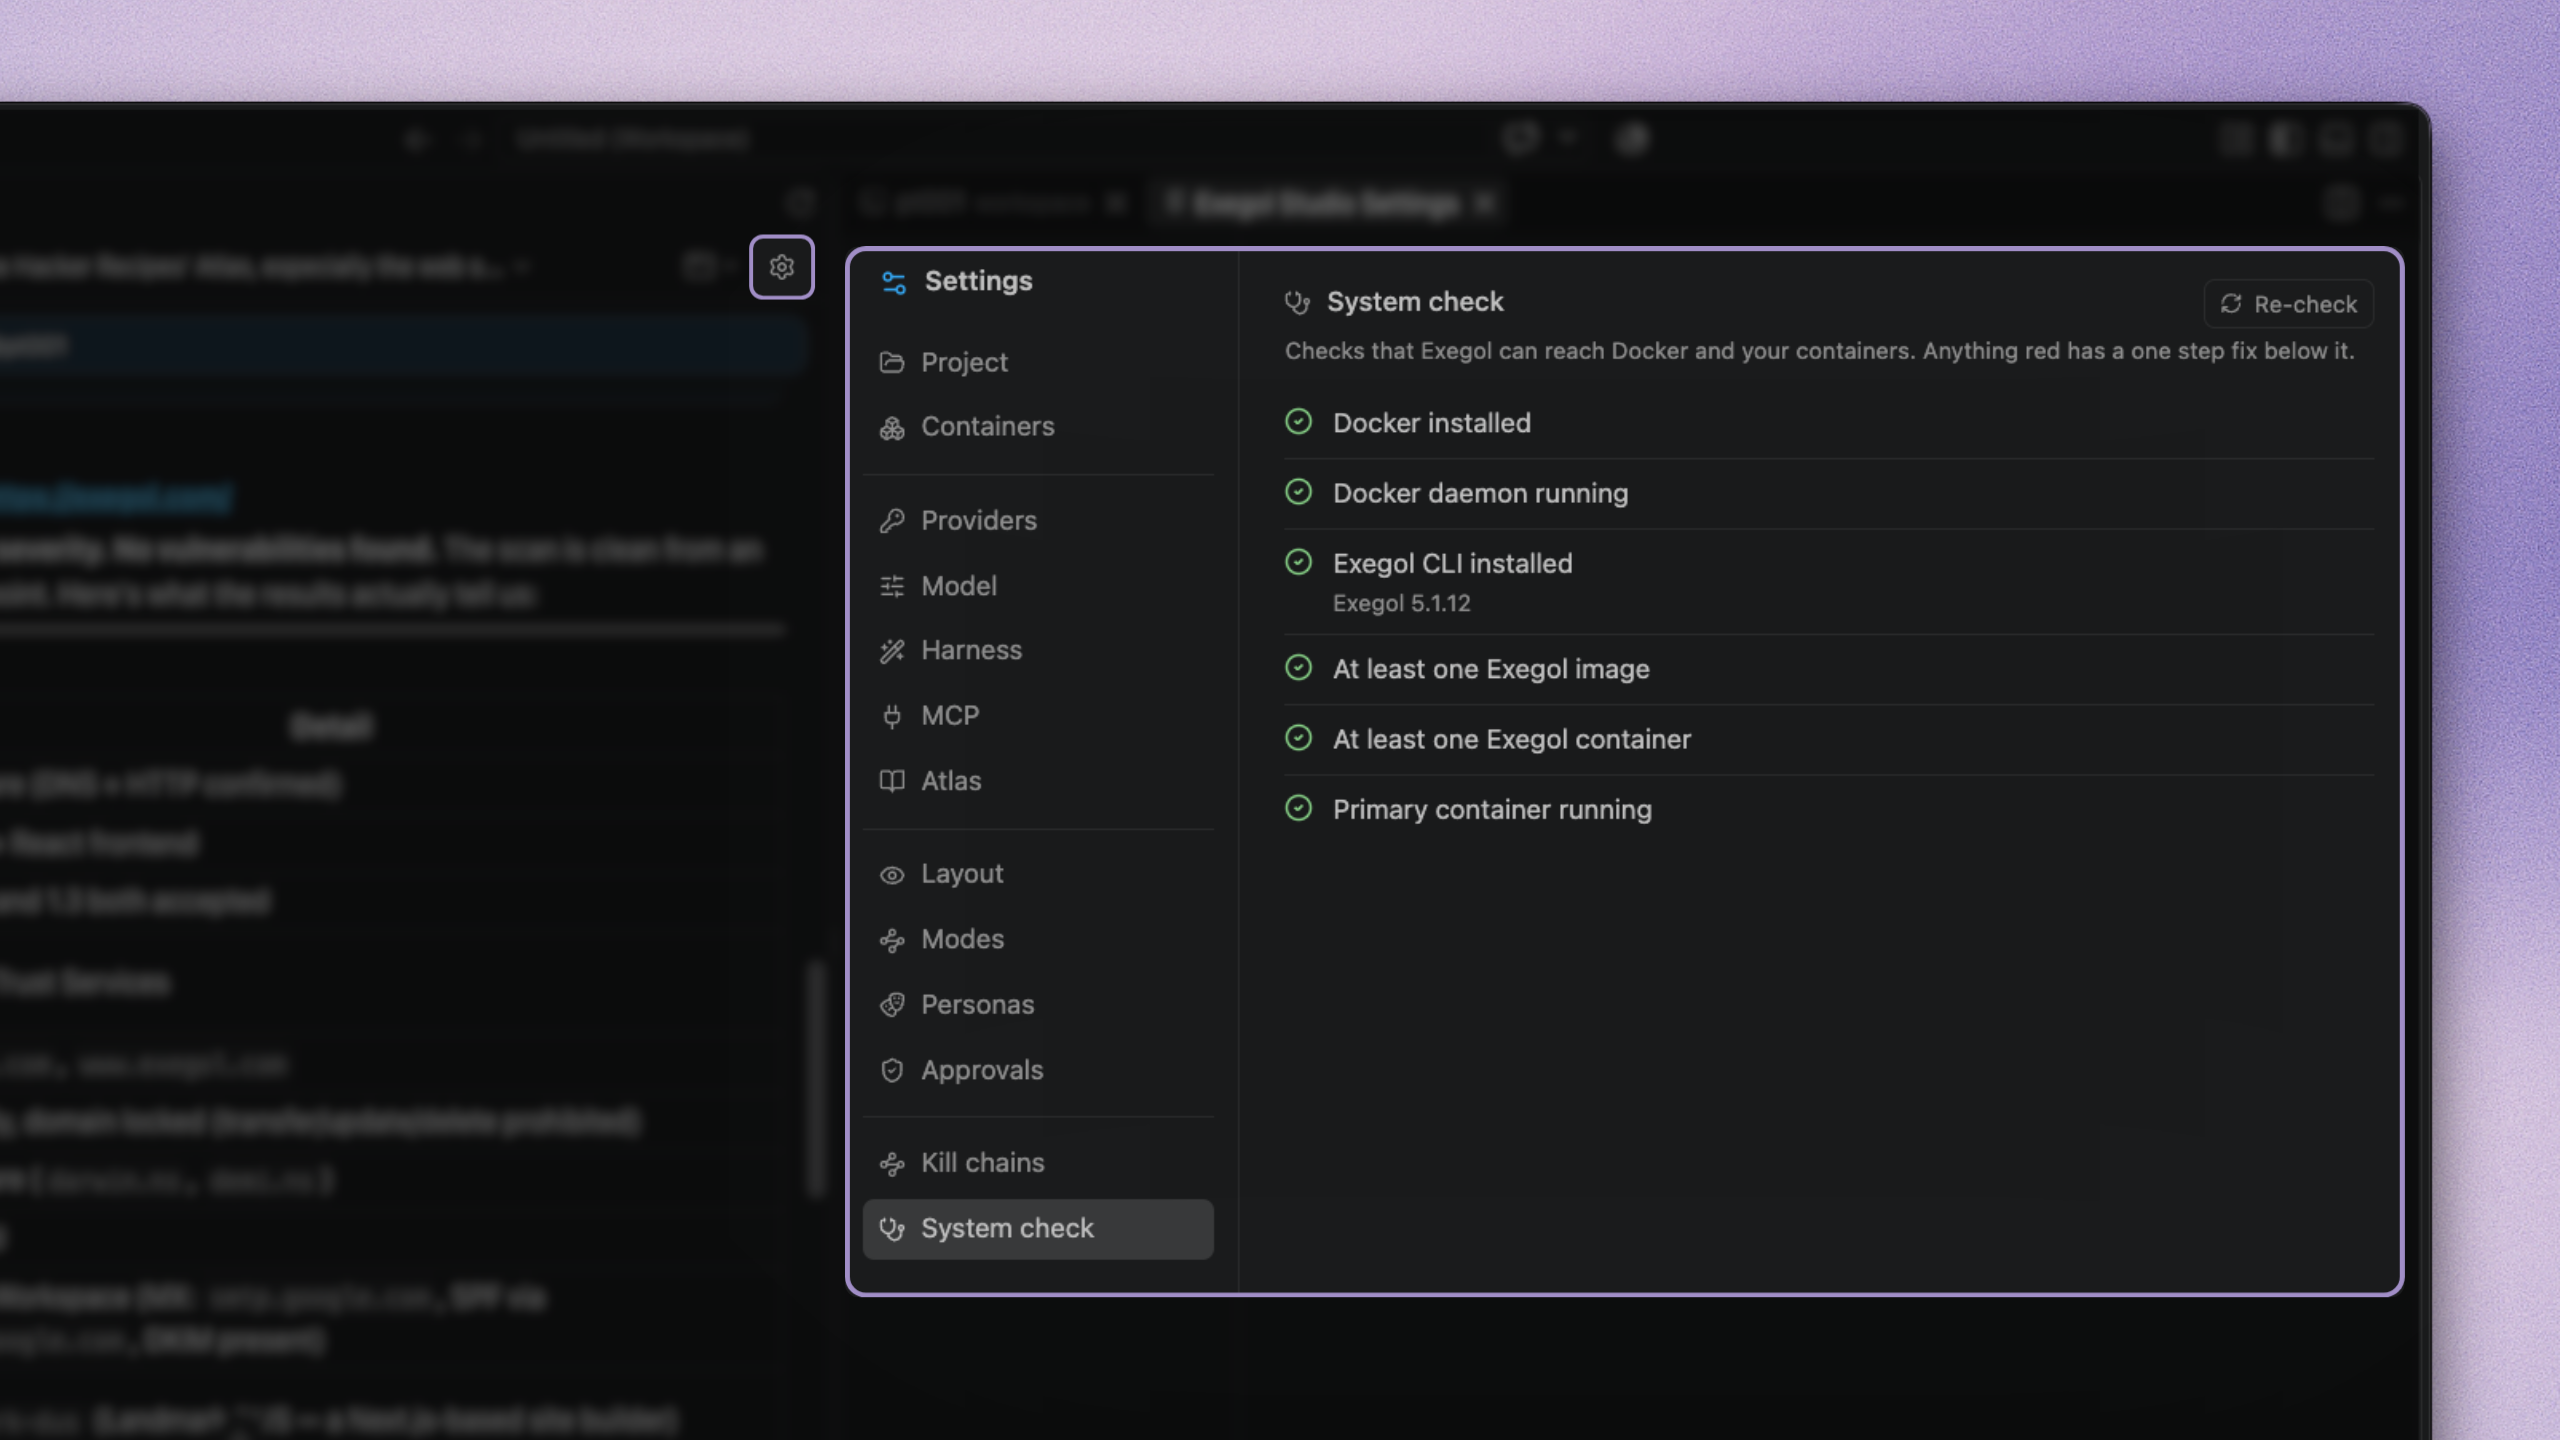
3. Connect a model provider
Open the cockpit (Exegol Studio icon). Open Settings, then Providers. Add an API key for a cloud provider, or sign in with a subscription where that is offered.
You can use a model provider from the cloud, or self-host your own model provider. See Providers and models for more details.
4. Create a project and pick a container
A project is one engagement. It scopes sessions, the container, and project-local policy.
Create one from Settings → projects (New project), then link a running Exegol container, or create one.
What next
- Learn to use the Composer: attachments, MCP button, context gauge, quick settings
- Choose your layout: Layouts (Monitor, Editor, Chat), Rooms
- Use Rooms to have multiple parallel sessions in the same engagement
- Adapt the Knowledge: skills, rules, agents, hooks, briefs, MCPs, Atlas
Prompts, file contents, and command output go to your model provider. Confirm retention terms match the engagement, or use a self-hosted provider